Page 2 of 4
Posted: 02 Aug 2013, 13:40
by Muirium
JBert wrote:Muirium wrote:As I understand, it's backwards compatible with Teensy 2 binaries, if you already have one.
I haven't got a Teensy 3, but I don't think that's the case. I believe you can recompile your Teensy 2 C-code without too much trouble, but the binary "hex" files uses different instruction sets and hence might not run on the ARM processor of the Teensy 3.
You may very well be entirely right! The only Teensies I've ever dealt with are Teensy 2's. They're essentially perfect for this work.
Posted: 03 Aug 2013, 22:38
by pjmelon
Excellent, I have ordered two teensy 2.0's. I am not 100% certain on the exact layout that I will use. Suka is going to help me with a frame so that I can iron it all out. I am leaning toward a staggered layout but having the frame will help me make the decision.
Will order a set of blank DSA keycaps from Signature Plastics. the lack of sculpturing will give me the ultimate flexibility. I will also order some red cherry mx switches and diodes.
Yay, excited to get this project moving and will post updates as I go along
Posted: 04 Aug 2013, 01:46
by Muirium
DSA and reds? Fine choices both. And Suka's assistance! You're all set. This should be good.
Posted: 04 Aug 2013, 05:14
by pjmelon
Changed my mind and got the switch sampler from WASD. The Cherry MX Clear are tempting but wanted to compare them to the blue. Easier if I had all of them to compare at the same time.
Still will stick to the blank DSA keys from Signature Plastics, if they are blank I can move them to get either staggered or matrix.
Only thing I don't like about the DSA keys is that I can't find dimensions for anything except the 1*1. At least if I get the keycaps first I can play around and measure them before I get any steel cut.
Posted: 17 Aug 2013, 05:42
by pjmelon
So I finally got some of the keyboard materials. I got my teensy, keycaps and switch trial.
I love the clear MX switch although it was a close call over the brown.
The DSA keycaps were great as well. Does anyone happen to have the dimensions of these keycaps?
I could measure them but would really like high accuracy and would rather avoid buying caliper if I can help it. The Signature Plastics site only has the dimensions for the 1*1 on their site.
Posted: 24 Aug 2013, 05:23
by pjmelon
Muirium wrote:One tutorial coming up:
http://deskthority.net/workshop-f7/brow ... ml#p116902
Teensy 2 is the go-to hardware for a custom controller. It's plenty fast and capable for the purpose, and damn small, which really helps.
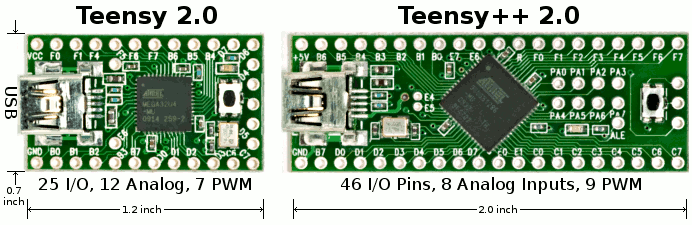

Whenever people need more pins, they go up to the Teensy++ 2, which has plenty. The Teensy 3's advantage is its more powerful hardware for situations more demanding than keyboard control. As I understand, it's backwards compatible with Teensy 2 binaries, if you already have one.
Now that I have had a chance to play around with the teensy I am a little confused.
Step 8 of matt3o's tutorial covers the teensy firmware but is very general and not what I would consider a tutorial. Does anyone know any more resources on programming the teensy firmware?
Posted: 24 Aug 2013, 13:26
by Muirium
Matt marked it as something needing a tutorial of its own, actually. I'll know more when I get that far with my project. I've flashed a Teensy with Soarer's converter firmware so I know that bit. Dead easy, in fact. The complex stuff lives in modifying Hasu's code when making a controller. I believe you edit the matrix definition to match your physical layout, then compile and upload to the Teensy.
Posted: 25 Aug 2013, 04:25
by pjmelon
I agree, it is something that would need a tutorial later on.
I have managed to get to the stage where I have taken hasu's firmware and have managed to compile it and upload it to the teensy. I do not know whether it works or not but I have no problems uploading firmware so am confident. It is building the matrix that is the bit that I am struggling with. What is life without a challenge.

Posted: 26 Aug 2013, 04:35
by pjmelon
Thanks to Suka I have a keyboard frame for an early prototype. The goal here is figure out whether the staggered layout works for me. I have assembled the keys in a 4 *12 Matrix.
I have attached images of the layout as well as the frame itself. My goal is to use the mod key to access the second layer.
I have managed to get Hasu's code and played around with the GH60. What I am struggling to do is to code the teensy 2.
Can anyone help me customize the GH60 code so that I can get this keyboard working?
Again thanks Suka for the frame, greatly appreciated
Posted: 26 Aug 2013, 20:11
by matt3o
how did you connect the rows/cols to the teensy?
Posted: 26 Aug 2013, 20:41
by pjmelon
I havent as yet done the soldering, I was planning to connect them as you did in the tutorial. Just imagine that the two halves are joined together like you did in the tutorial. I was unsure on what pins to connect it to on the teensy.
I can do the soldering tonight and post a picture for your if you need that information.
Posted: 26 Aug 2013, 21:30
by matt3o
okay let's say it is a standard keyboard. You have 4 rows and 12 cols. Very easy.
You could connects the cols to PB0,1,2,3,7,PD0,1,2,3,PC6,7,PD5
And the rows to PF0,1,4,5. This is just a suggestion, you can do whatever you want, just remember to skip pin PD6.
With this config it should be pretty easy to compile a firmware. When you confirmed the wiring we can proceed to coding.
Posted: 27 Aug 2013, 07:27
by ماء
pjmelon wrote:Thanks to Suka I have a keyboard frame for an early prototype. The goal here is figure out whether the staggered layout works for me. I have assembled the keys in a 4 *12 Matrix.
I have attached images of the layout as well as the frame itself. My goal is to use the mod key to access the second layer.
I have managed to get Hasu's code and played around with the GH60. What I am struggling to do is to code the teensy 2.
Can anyone help me customize the GH60 code so that I can get this keyboard working?
Again thanks Suka for the frame, greatly appreciated
What plate you use,stainless,alum,acyrylic or what?
Posted: 29 Aug 2013, 04:15
by pjmelon
The frame is 3D printed plastic (Suka can confirm material) Took a picture of the underside so you can see how it is mounted. It is very tough and has little flex.
I am starting to do the soldering now so will post it once it is all done. I may have been a little ambitious as to how quickly I could solder it all together. Moving house in two weeks so hopefully I get the basic soldering done before then.
Posted: 30 Aug 2013, 05:20
by pjmelon
Still going slowly. The pins on the switches seem to repel the solder. Have to play around with soldering technique.
Posted: 30 Aug 2013, 06:04
by ماء
it seems you are always ONLINE in the morning(asian),
online at night/morning(in DT) DT crowded at that hour
Interest your project,mini split keyboard it seems
Posted: 30 Aug 2013, 11:41
by Muirium
Hopefully this will make a good tutorial for matrix making and the appropriate modifications to the GH60 code. Suka generously sent me similar prototypes (symmetrically staggered!) and I have spare switches mounted ready to experiment. Once I have another Teensy and know how to code it…
Posted: 30 Aug 2013, 14:17
by suka
Nice! I did not expect you would actually build a board straight away with these frames, but if you like it that way, fine

In my designs (either split or single board) I connected the columns of both halves to get away with a 8x6 matrix needing 14 pins on the teensy.
Code for either my own or tmk_firmware is on github, put configuring rows and columns is really fairly easy if you know the basic logical operations on binary data. I put way too much effort in using F-Pins for columns and D for rows (also forgetting about LED on D6!) which makes neater code but a mess to solder all connections, but as Matt3o stated before basically any pin is fine. Only if you need certain special features (PWM for led, interrupts on PS/2 lines) make sure to reserve these pins for their future use.
Posted: 31 Aug 2013, 05:22
by pjmelon
Starting to see why you are surprised suka. Taking a long long time for something that is only temporary. Decided to move back to designing the full keyboard after I am 100% certain on the staggering.
Posted: 31 Aug 2013, 08:30
by ماء
Muirium wrote:Hopefully this will make a good tutorial for matrix making and the appropriate modifications to the GH60 code. Suka generously sent me similar prototypes (symmetrically staggered!) and I have spare switches mounted ready to experiment. Once I have another Teensy and know how to code it…
You making split keyboarad too,interest, any picture?

Thk
Posted: 30 Sep 2013, 04:34
by pjmelon
Well it has been a while. I moved house so have been a little distracted. I have played around with Suka's prototypes and have come to the following layout choice. The overall key spacing should be similar to Suka's but I added a few extra keys. Let me know what you all think of this. The two red buttons at the bottom are the mouse buttons and the rectangle the trackpad.
Posted: 30 Sep 2013, 12:27
by Muirium
The asymmetry would drive me nuts (because I have an unhealthy obsession for keeping things balanced) and the trackpad looks so small, but I expect you've tested these basics and have chosen what works for you. The overall split arrangement with symmetric stagger is definitely strong.
Posted: 01 Oct 2013, 05:17
by pjmelon
Sorry meant trackpoint and not trackpad.
Symmetry doesnt bother me, it is really only because it is split that you notice it. Most keyboards are right hand heavy with keys you just dont notice them as much.
Planning to get the layers cut at Big Blue Saw in aluminum as the price is the best (~$200). The Top and bottom plates will be cut out of aluminum sheet while the middle will be made out of two 0.25 inch aluminum layers.
Posted: 01 Oct 2013, 11:28
by Muirium
Ah, of course. Interesting that you're putting the nipple as far away from its usual position mingled with the keys. But from the outline that may be more the underlying PCB's choice than yours.
MTL took a different route in our lasering group buy:

Switch modding indeed!
http://deskthority.net/post127794.html#p127794
Aluminium's a smart choice for this work. I've a bit of steel hammering, filing and polishing ahead of me with my project. Moments like these you value a softer metal!
Posted: 02 Oct 2013, 04:54
by pjmelon
Yup the trackpoint is the only thing I need to firm up the measurements to ensure that it fits properly. The positioning of the trackpoint is similar to how it is positioned on MTL example, just shifted 14 mm to the left.
I am salvaging a trakpoint from a thinkpad usb keyboard so need to take photos of all the components and measure them. I have two trackpoint salvaged from thinkpad laptop keyboards but I havent figured out how to get the teensy to drive them properly.
Posted: 05 Oct 2013, 05:37
by pjmelon
So I am choosing to stick with aluminium and go with 2mm sheet for the top and the base and for the two middle parts will be 4.76 mm thickness each (9.5 mm total).
Works out to be fairly pricey but I think it is worth it and that the clearances are adequate.
Posted: 13 Oct 2013, 22:39
by pjmelon
Ok, up to my final decision before I get it sent to get cut. Both my laptop keyboard and usb keyboard have a palm rest and was looking to replicate it. Here is a comparison between the two, one with a palm rest and one without.
Opinions?
Posted: 16 Oct 2013, 05:26
by mtl
I use a hard, flat acrylic wrist rest and like it. Having one seamlessly part of the keyboard would be nice as well.
If you go with the rest, you may want to file down the sharp edge that will be facing you. Also, since it will be supporting the weight of your arms, it may be good to have an additional support screw in the (horizontal) middles near the bottom row of keys. A couple other things to consider is the wrist rest will give you more internal space for wires, components, etc., and add weight to the keyboard (pro or con depending on your preference).
Posted: 18 Oct 2013, 04:09
by pjmelon
Weight is not the biggest concern for me. As for the sharp edges will have them covered with something. I will also think about adding a beam in the middle for support, it is a good idea and will reduce flex in the keyboard.
Posted: 06 Nov 2013, 05:16
by pjmelon
Excellent got a quote done up with a local waterjet cutting company. The price is around $200 which is comparable to some US companies so will get it done here.