Page 1 of 2
IBM M Repair centre :-) 3 x SSK
Posted: 04 Jun 2015, 08:43
by idollar
Hello,
I am working on this at the minute:
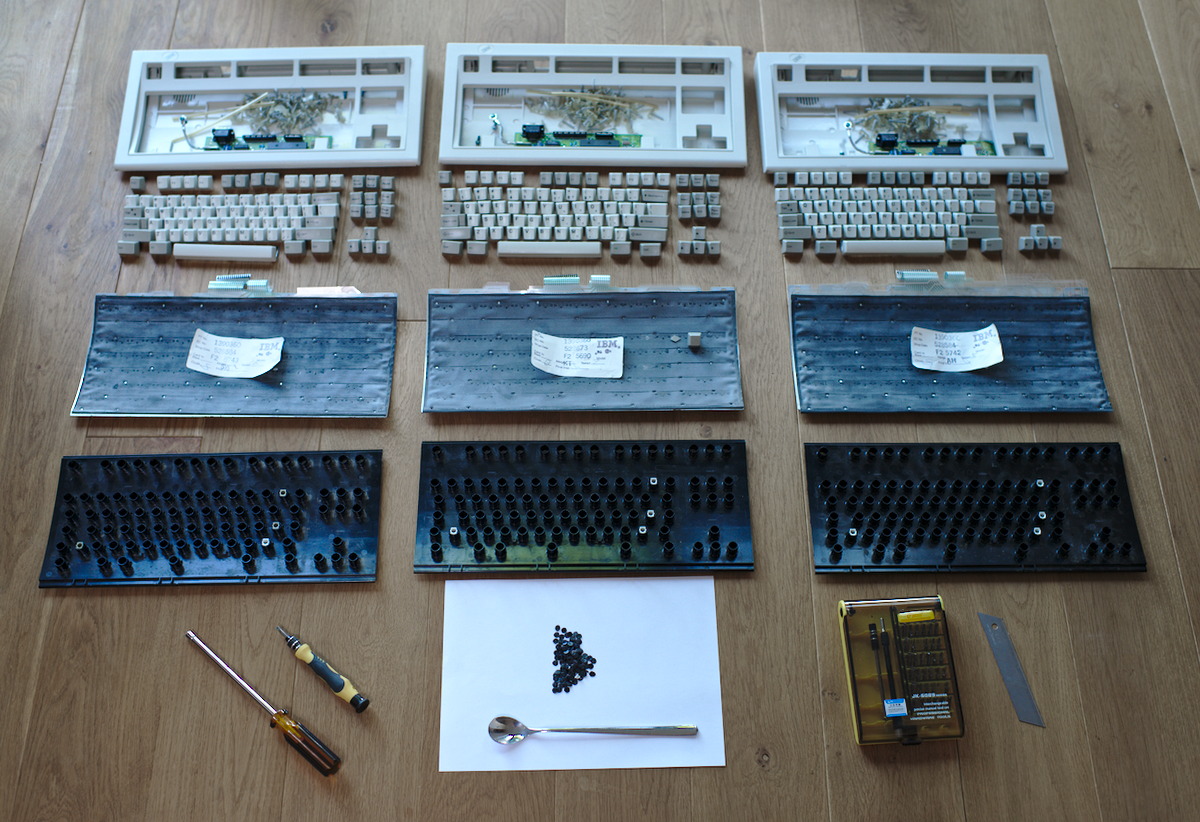
- DSC_2882_01.jpg (347.23 KiB) Viewed 6063 times
They are not mine. It is a favor to a new/old DT member.
Do not worry hammelgammler, I will not mention your nickname

i$
Posted: 04 Jun 2015, 09:40
by HzFaq
I have that same screwdriver set, the bits keep disappearing into the handle...
Also, as with nearly everyone else on this site, you work much tidier than me

.
Can't wait to see the final results.
Posted: 04 Jun 2015, 09:45
by Khers
Looks neat i$! Just wonder what the spoon is for

Posted: 04 Jun 2015, 09:46
by idollar
Khers wrote: Looks neat i$! Just wonder what the spoon is for
It is my key puller
Posted: 04 Jun 2015, 09:48
by Khers
Never seen that before! Do you prefer it for IBMs as compared to a wire puller?
Posted: 04 Jun 2015, 09:53
by idollar
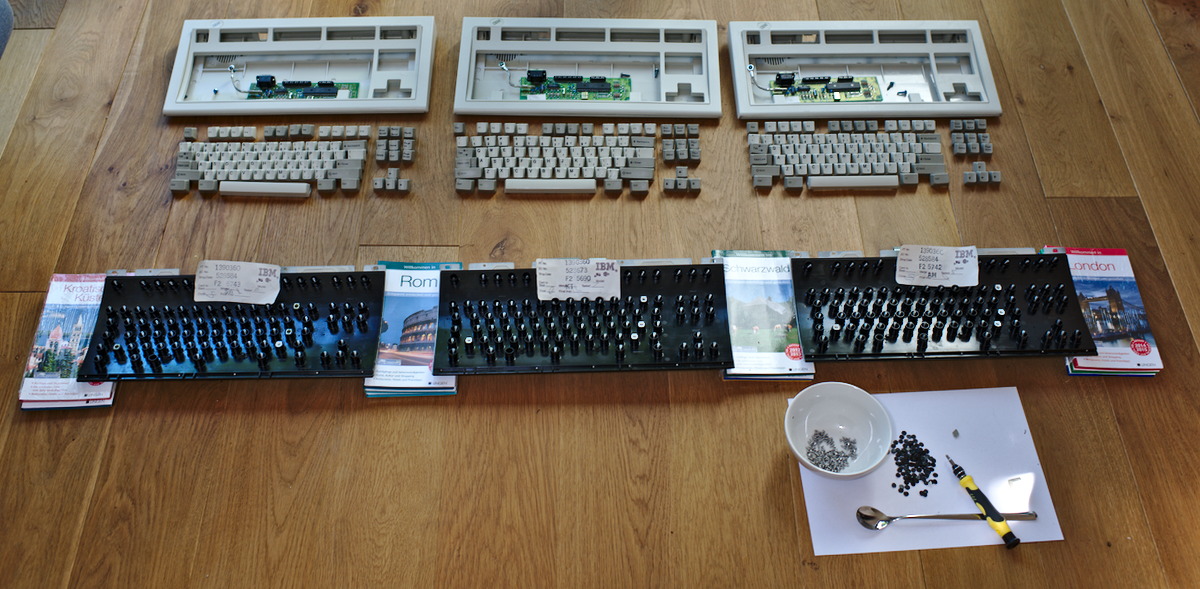
Rivets are off
Holes are in
Now they deserve a bath, don't they ?
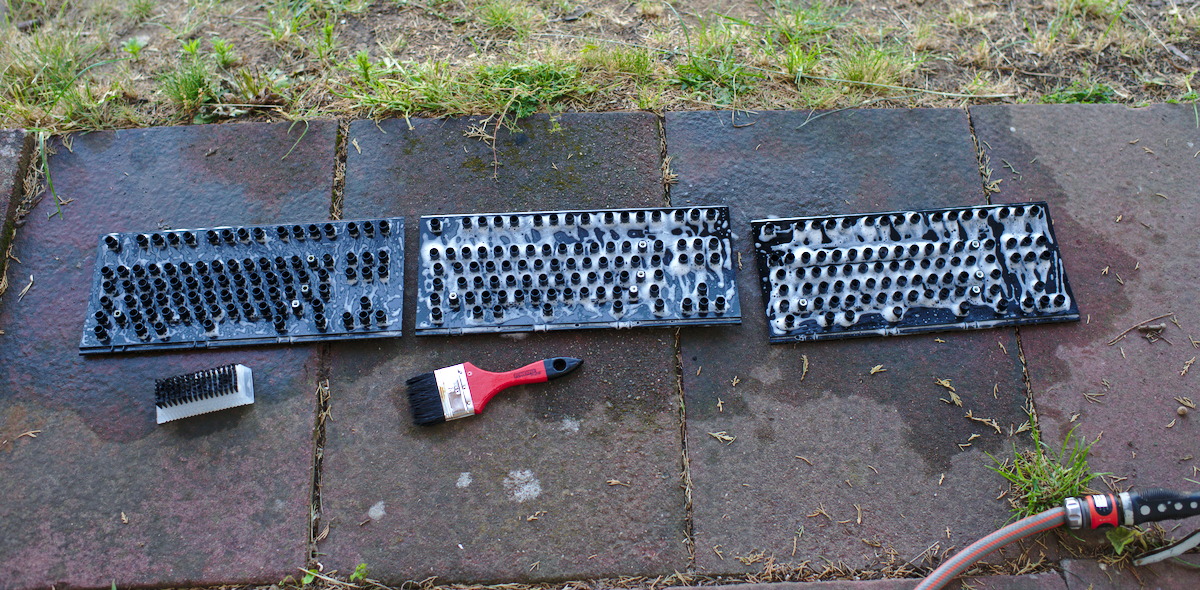
- DSC_2883.jpg (433.58 KiB) Viewed 6039 times
Posted: 04 Jun 2015, 09:54
by idollar
I climbed to the roof of my house to ensure that they dry out properly ...
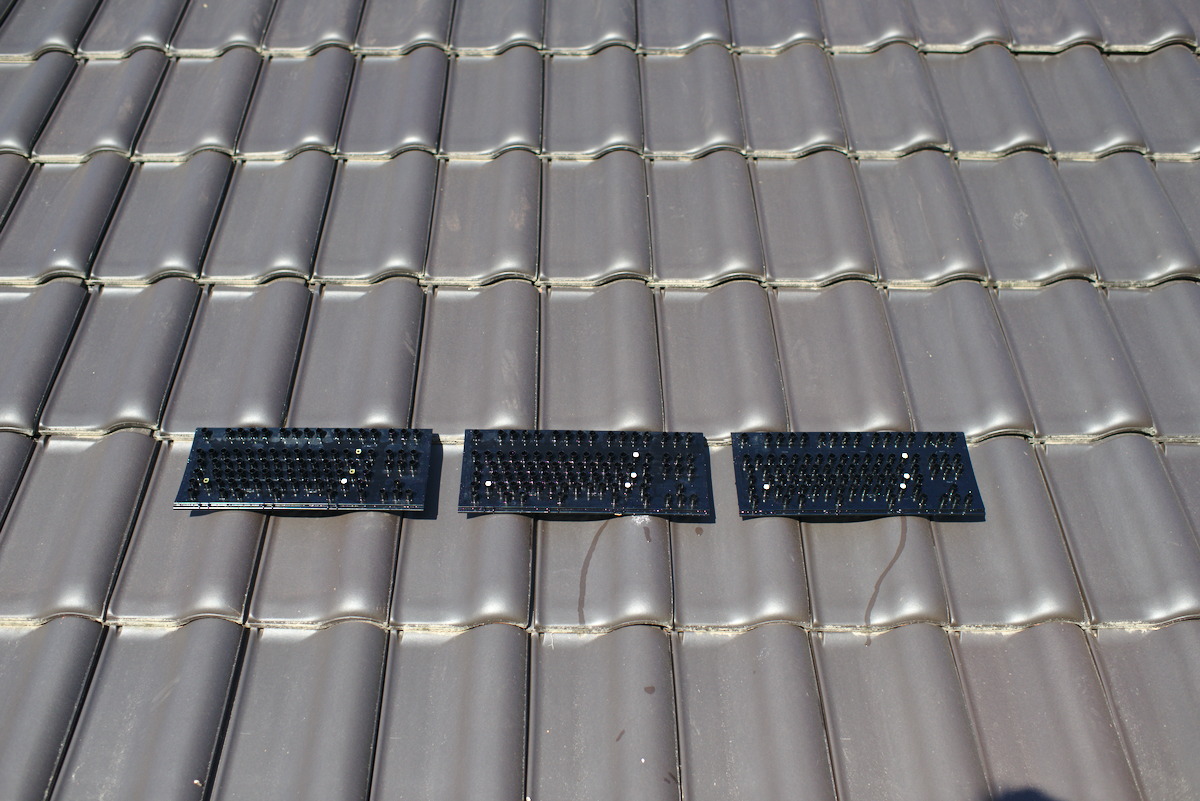
- DSC_2884.jpg (274.47 KiB) Viewed 6028 times
Posted: 04 Jun 2015, 09:55
by idollar
Well, I did not really

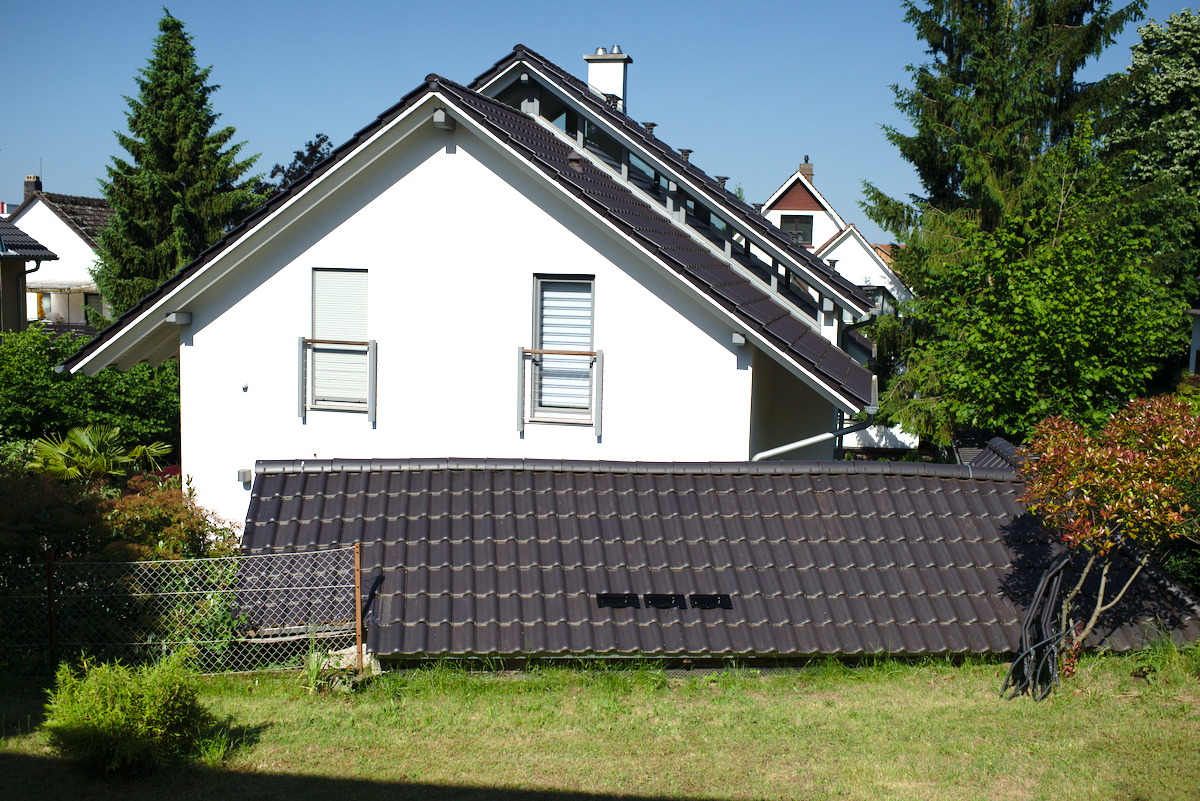
- DSC_2885.jpg (471.43 KiB) Viewed 6027 times
Posted: 04 Jun 2015, 10:00
by ramnes
I would have removed the inserts for the stabilizers before doing the bath. Aren't they a bit lubricated?
Posted: 04 Jun 2015, 10:12
by hammelgammler
Well... To my defense their not only mine either... Only two of them.
Thank you very much for your help with them! Looks very organized and well planned.
Posted: 04 Jun 2015, 10:24
by idollar
ramnes wrote: I would have removed the inserts for the stabilizers before doing the bath. Aren't they a bit lubricated?
I never noticed any lubrication on the inserts, but it is a good idea. Next time.
@hammelgammler : feel free to ask for your money back for a bad done work
Posted: 04 Jun 2015, 10:38
by idollar
Croatia, Rome, Black Forest, London
This time the Austrians were only supporting with the tools
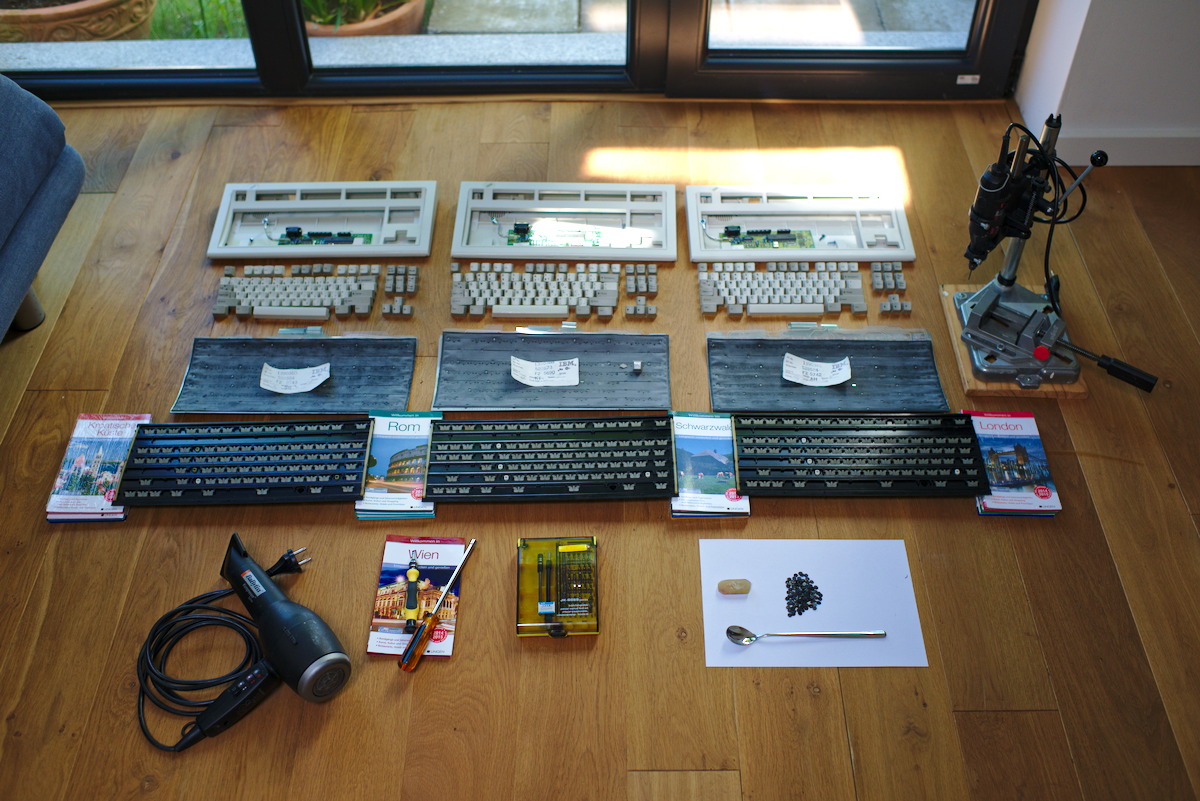
- DSC_2886.jpg (336.27 KiB) Viewed 5998 times
Posted: 04 Jun 2015, 10:58
by idollar
Time to screw ...
One of the most frustrating things with a bolt/screw mod is to complete the mod, place the caps back, and realise that they moved during the process. I found a procedure that normally works.
I start on the bottom of the board and WITHOUT FORCING THE BARRELS PLATE I keep on screwing up. When the board is back fixed with the forced bending, I screw the corners. This fixes all the flippers in place without needing to move the sandwich at all.
A picture is worth thousand words:
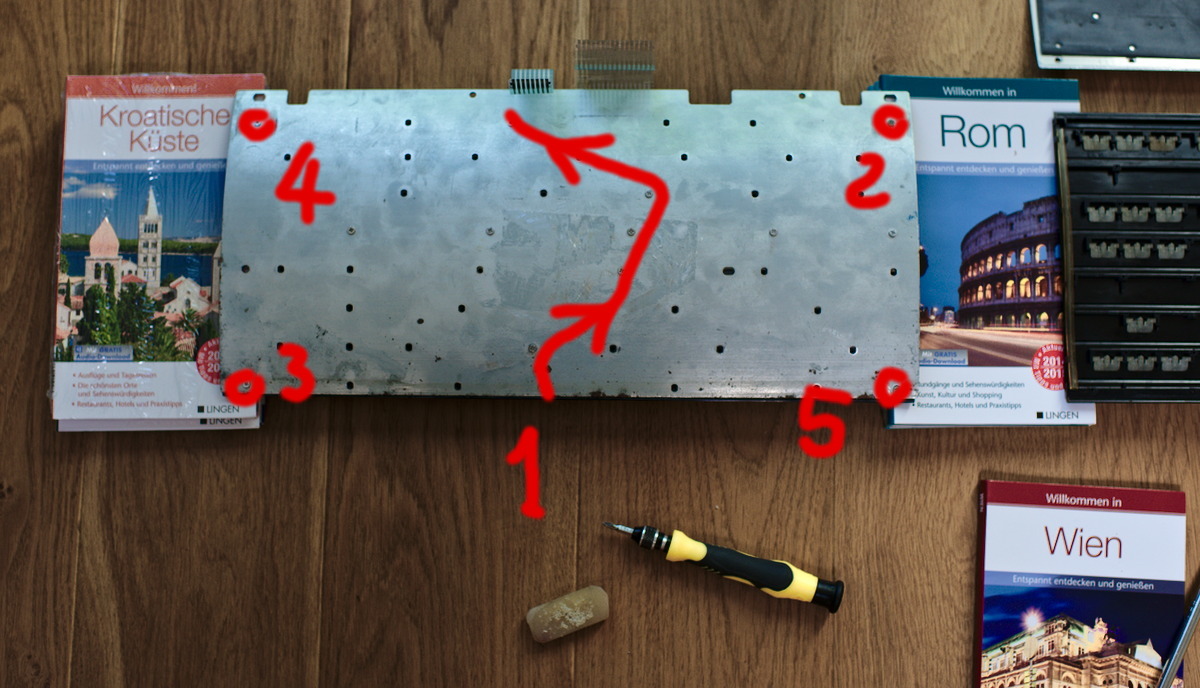
- DSC_2888 - order.jpg (249.49 KiB) Viewed 5992 times
And there without the painting:
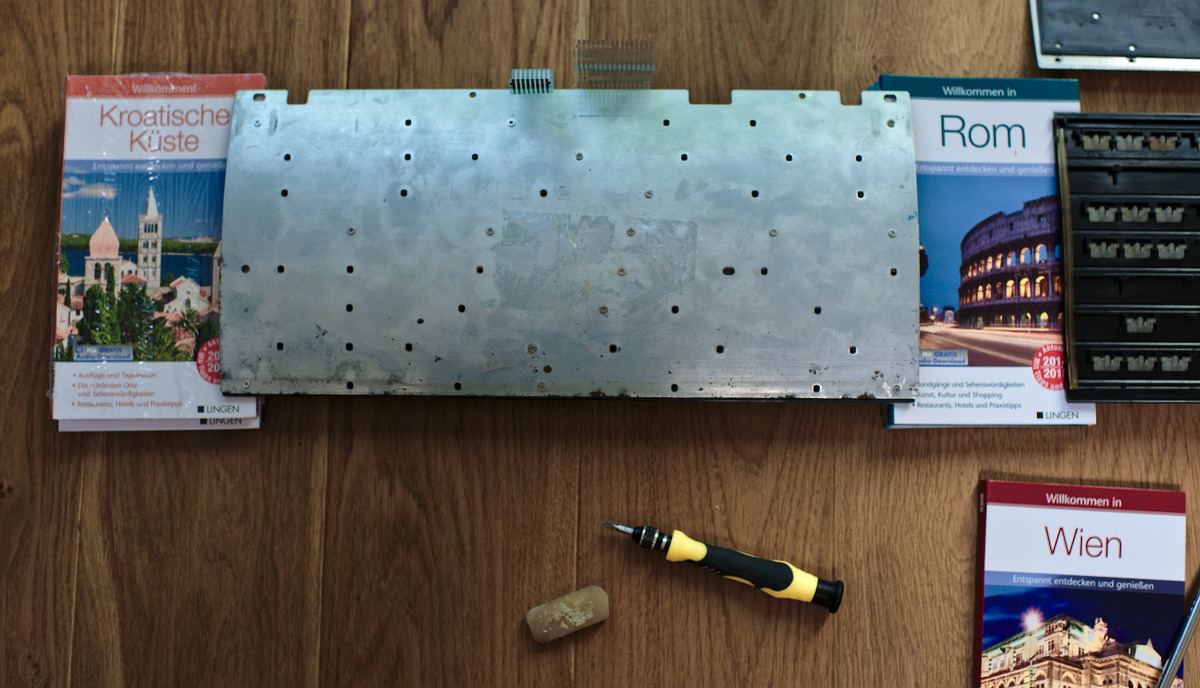
- DSC_2888.jpg (254.04 KiB) Viewed 5992 times
After this first phase, one can screw the remaining screws.
It is important NOT TO TIGHT THEM a lot. Actually I screw them until the end and then I UNDO ONE TURN.
Tightening too much will make the sandwich too rigid. Some keys may not work.
Posted: 04 Jun 2015, 11:19
by idollar
Do not forget to clean the contacts. A pencil rubber pencil will do the trick. Careful with bending the matrix !
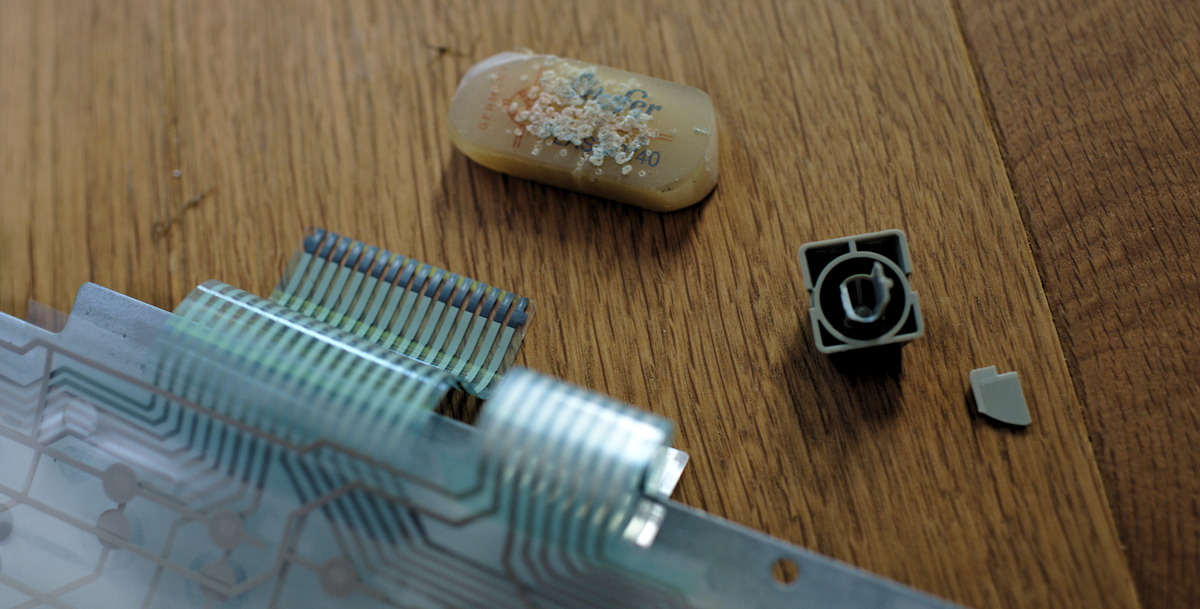
- DSC_2889.jpg (212.67 KiB) Viewed 5984 times
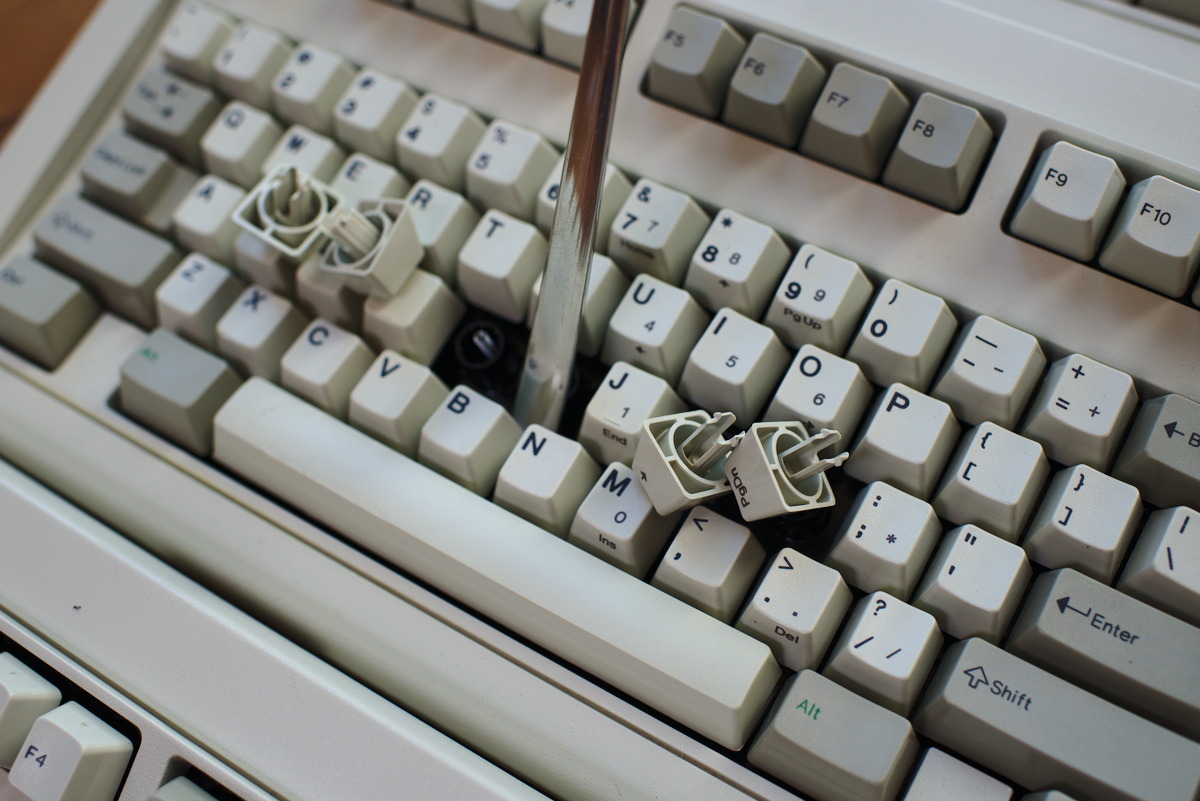
@hammelgammler - One of the under-keys was broken (or I broke it without noticing). We are very lucky as it was the control key. Other keys are one piece only. In an SSK with these special keylegends it could have been a disaster. It was not the case, anyhow.
Everything is back nominal using one of the spares that you sent to me.
Note: It is the first time that I see one of these breaking.
Posted: 04 Jun 2015, 11:40
by idollar
I've got you under my skin ...
- DSC_2895.jpg (183.62 KiB) Viewed 5981 times
Posted: 04 Jun 2015, 11:52
by idollar
We are getting there !!!
- DSC_2897.jpg (281.76 KiB) Viewed 5978 times
Posted: 04 Jun 2015, 11:54
by andrewjoy
idollar wrote:
@hammelgammler - One of the under-keys was broken (or I broke it without noticing). We are very lucky as it was the control key. Other keys are one piece only. In an SSK with these special keylegends
One part SSK caps exist ? Man i need that !
Posted: 04 Jun 2015, 12:13
by idollar
We are done.
Testing is missing.
- DSC_2898.jpg (399.55 KiB) Viewed 5960 times
Posted: 04 Jun 2015, 12:17
by idollar
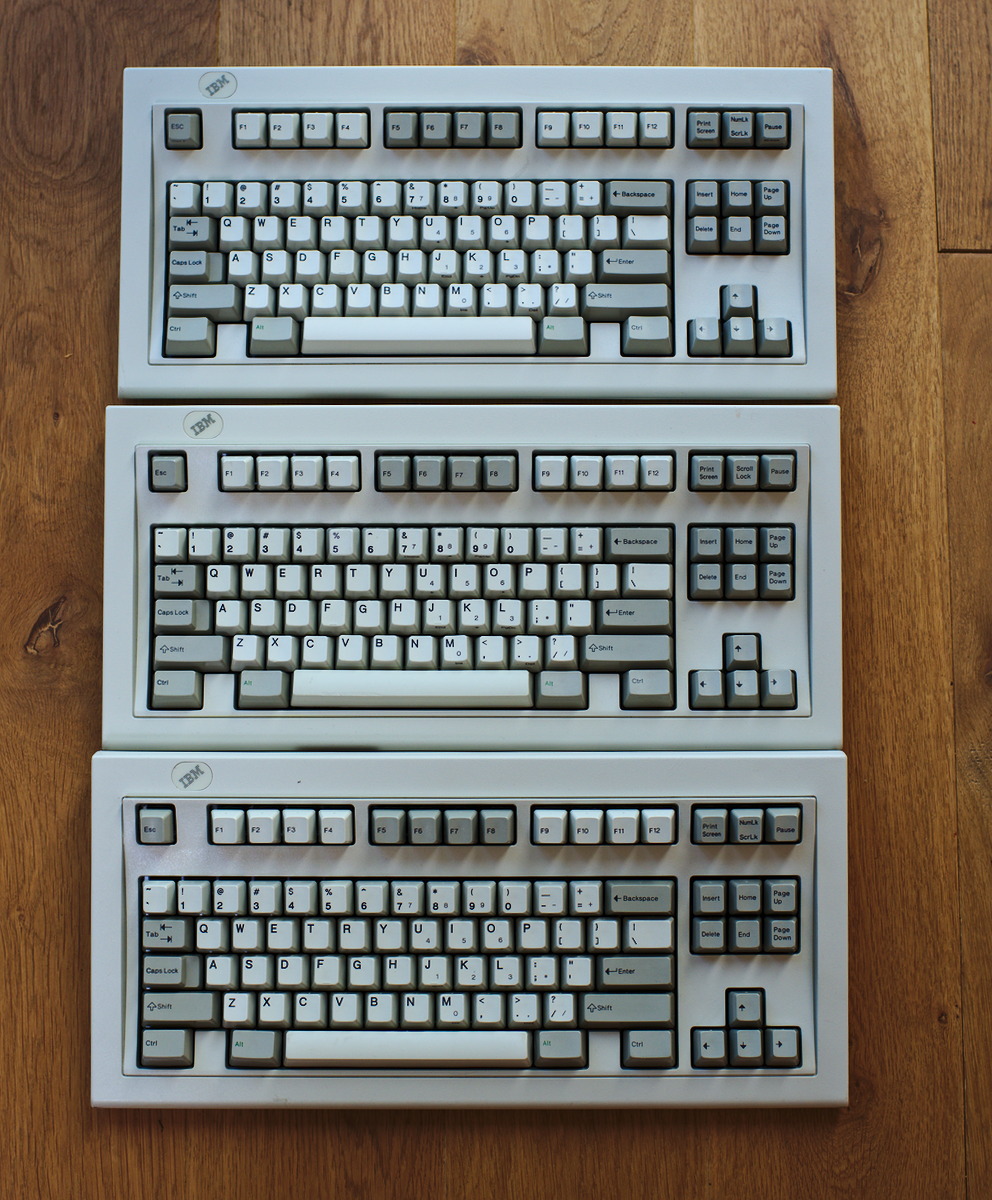
Two in one - on popular demand
andrewjoy wrote: idollar wrote:
@hammelgammler - One of the under-keys was broken (or I broke it without noticing). We are very lucky as it was the control key. Other keys are one piece only. In an SSK with these special keylegends
One part SSK caps exist ? Man i need that !
Khers wrote: Looks neat i$! Just wonder what the spoon is for
- DSC_2899.jpg (238.21 KiB) Viewed 5957 times
The spoon works better when you are undoing all the keycaps. I normally do not use it in other cases
Posted: 04 Jun 2015, 12:24
by idollar
Typing with the first keyboard that seems to work.
I have tested all the keys using xed.
The tight control seems to be a little bit softer than the other keys, but I let hammelgammler check it thoroughly and adjust the pressure of the screws as needed.
Lets move to the second one.
BTW - Yes, T and R were swapped. I correct it.
The birthday of this one is 24NOV87
Posted: 04 Jun 2015, 12:25
by andrewjoy
the caps look amazing! the printing on the embedded number pad looks darker than my 1990 SSK, but one part caps is the dream.
Posted: 04 Jun 2015, 12:26
by idollar
I am now typing with the second keyboard that seems to be working nicely also.
In this case i have noticed nothing rare.
The birthday of this one is: 11SEP87
Posted: 04 Jun 2015, 12:30
by idollar
ok, i am typing with the third keyboard.
none of the shifts works. let me try with the same board but a different controller. i do not want to undo all these screws to then find out that the controller did not work properly
the birthday of this one is 22nov87
Posted: 04 Jun 2015, 12:42
by idollar
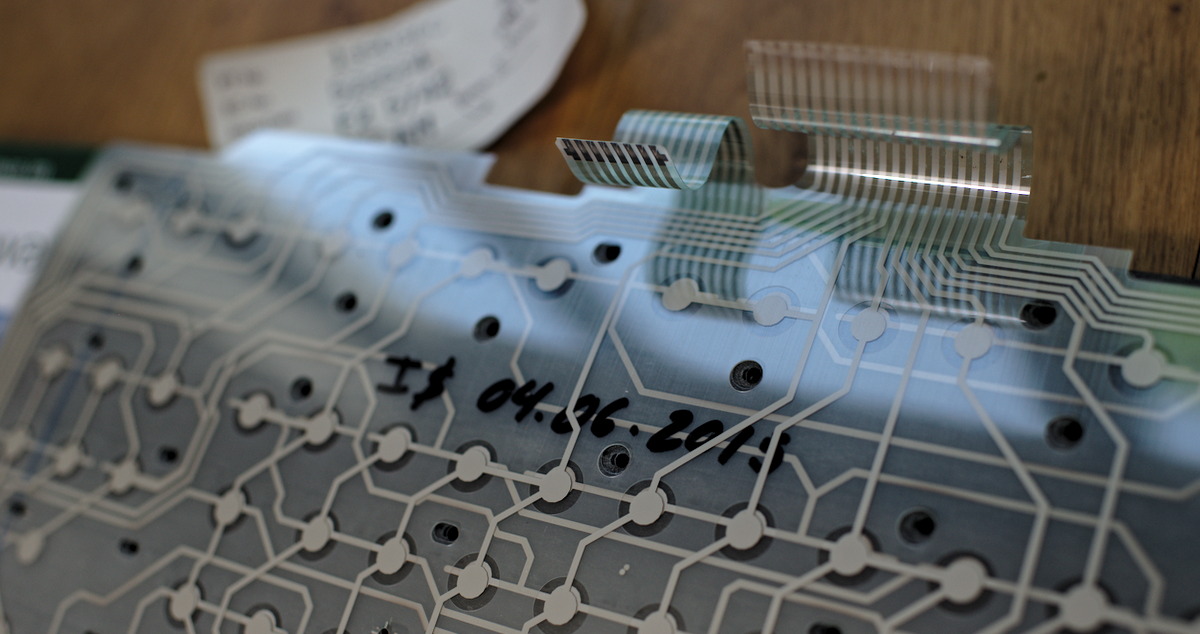
It seems that the membrane is broken.
Do not worry, it can be repaired and in the worst case scenario, I have a spare.
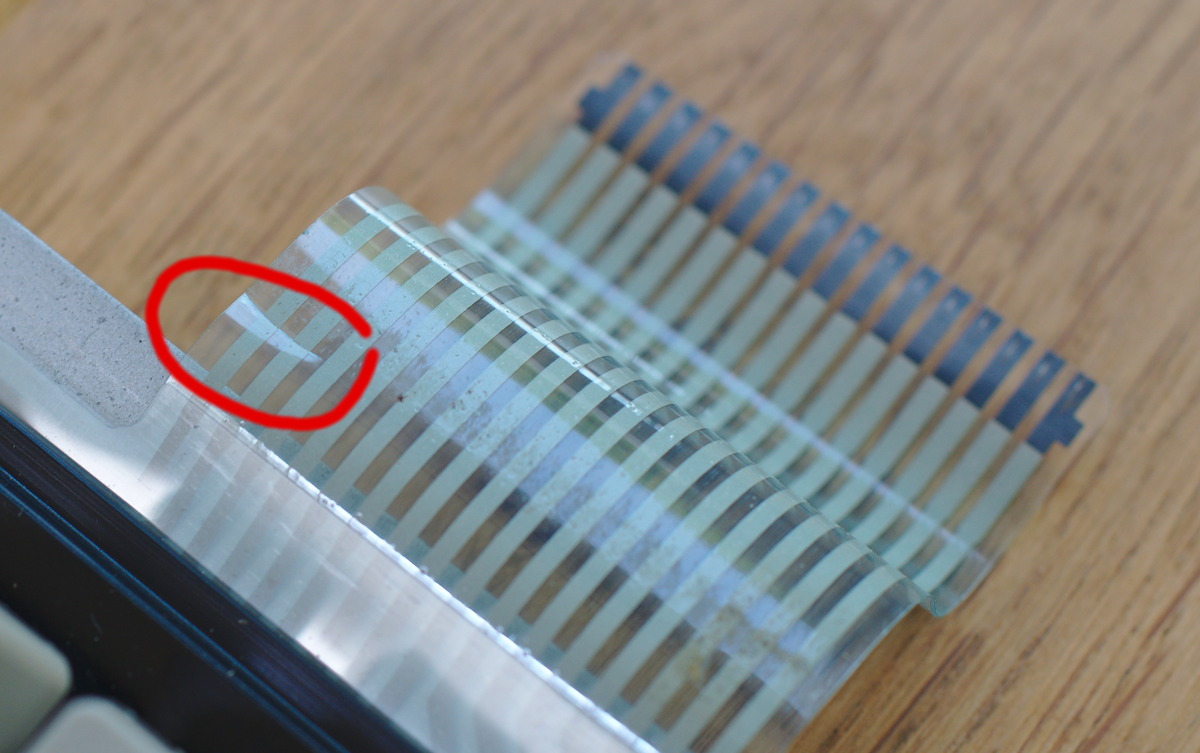
- DSC_2900 - marked.jpg (193.9 KiB) Viewed 5938 times
Posted: 04 Jun 2015, 12:45
by idollar
It may not be the membrane. They keys that are failing are not in the same row (Bothe Controls and SHIFTS)

Posted: 04 Jun 2015, 12:51
by idollar
A different controller has the same problem
Time to remove this screws

Posted: 04 Jun 2015, 13:09
by idollar
The membrane is broken.
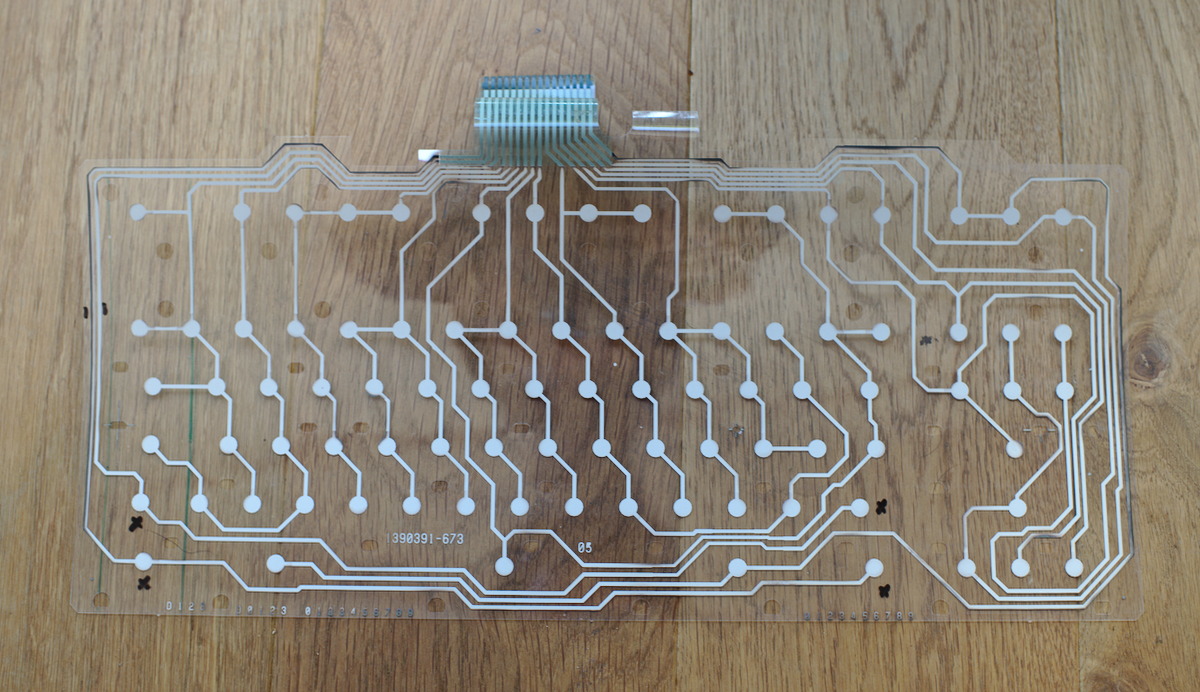
- DSC_2901_01.jpg (296.84 KiB) Viewed 5924 times
Lets repair it
Posted: 04 Jun 2015, 13:19
by idollar
We first scratch the TOP surface. It is thinner than the bottom side.
To then apply the conductive paint
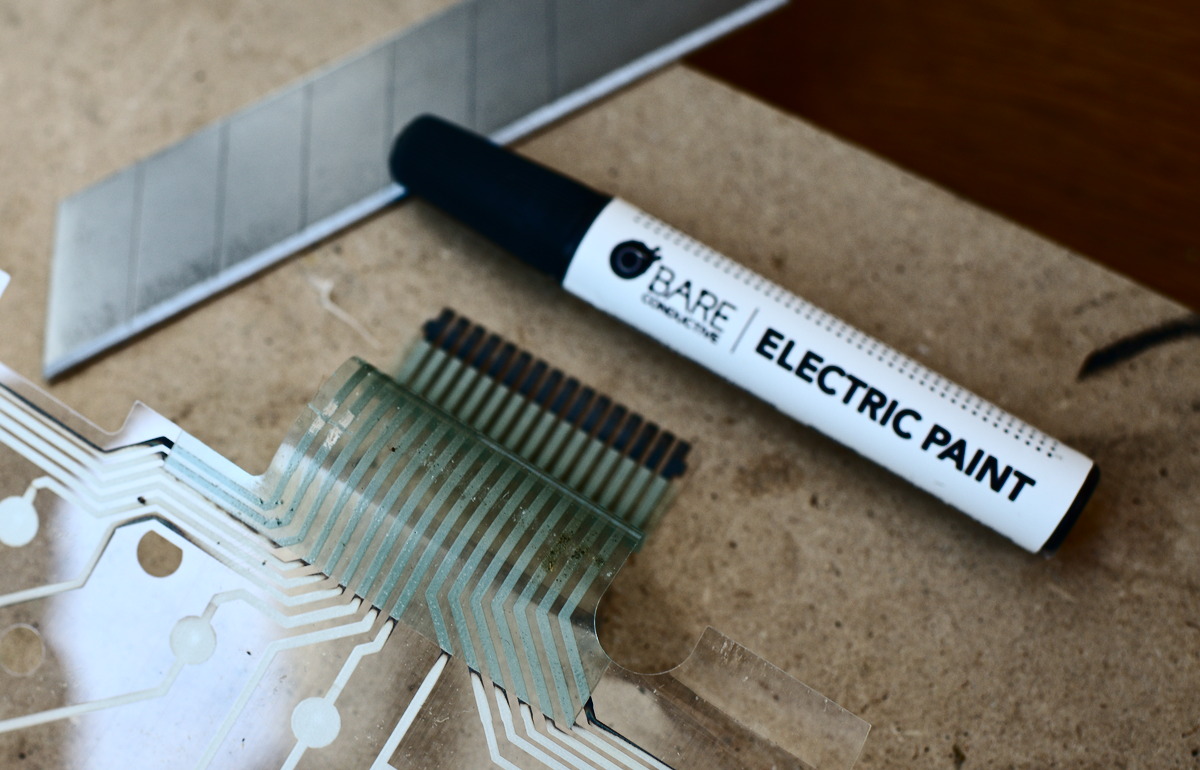
- DSC_2902.jpg (228.21 KiB) Viewed 5910 times
that shall dry out before it gets conductive.
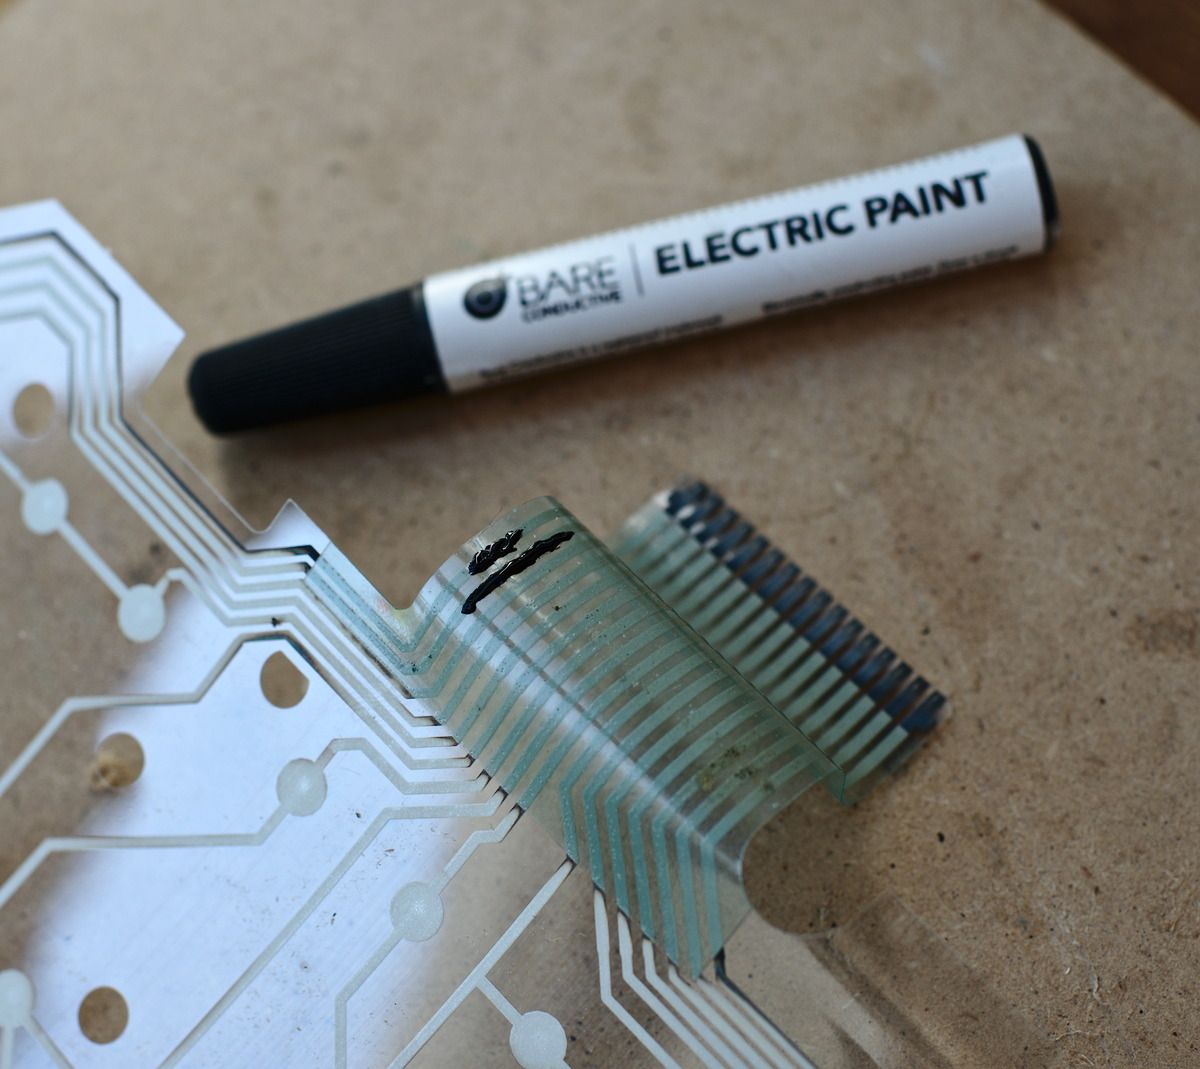
- DSC_2903.jpg (276.92 KiB) Viewed 5910 times
hammelgammler: this was not in our deal
It was just the screw mod

Do not worry, I will just charge you double ( 0 x 2 =
0 )
UPS .... what a typo
Posted: 04 Jun 2015, 13:23
by hammelgammler
Yeah we can talk about that.
I really don't know if the membrane was broken before, I normally tested every board after cleaned them. :/
Sorry that you have more work then necessary.
Edit: At least there are high quality pictures of how to repair a broken membrane...
Posted: 04 Jun 2015, 13:29
by idollar
There is nothing to talk about ... I know where you live

I will charge you double

(what a typo in my previous post. I cannot multiply !)
It is working. I just have to post some pictures on how it was tested and mount it back