NTC KB-6851EA (Soarer's Converter with a cheap Teensy clone)

User avatar
Shinryuu

29 Jan 2016, 22:28

Hey! I had some spare Teensy clones aka. Pro Micros to fiddle with and I decided to make a AT to USB mod with NTC KB-6851EA keyboard. NTC stands for NAN TAN COMPUTER CO. and it seems to be from Taiwan. I like how keys are arranged on the board and it makes the layout even more obscure yet delicious. This keyboard has white ALPS and Greek sub-legend caps. Modding went quite well even I had to whip myself a bit and go through trial and error because I didn't seem to understand things correctly, like I forgot to flip things when I soldered wires in. Unfortunately I didn't take many pictures along the way but I took some of them afterwards because I though it would be nice to have a guide and information floating around. As a side note: if you have issues with some keys to register, I recommend to look at your PCB and try to look around compotents if they have anything that is brown. It's just some corrosion that's making things worse. I was able to fix my board just by resoldering and heating things a bit. You'll need some hot-setting adhesive (aka. hot glue?), anything that is sharp enough and a basic knowledge about soldering. Because I was feeling a bit paranoid, I had thin latex gloved equipped on. Because this is a bit hackish I recommend to make mounting more safe and secure but that's up to you. I'm sure you can make wonders with just a USB Micro-B to Mini-USB adapter alone.

I must thank scottc a lot for making this guide available, workshop-f7/how-to-use-a-pro-micro-as-a ... t8448.html I recommend everyone to read that who's going to attempt this mod. If you can't enter a bootloader mode or whatever it's called; you'll have to shorten GDN and RST while you power it on.

Here's the actual board with no mods.
Image

Cosmic Greek keycaps.
Image

My first mission was to figure out how to solder wires correctly. I made a correct map which is already flipped so you don't have to worry about that at all. I cut my AT cable and took wires from there. If your nails aren't long enough to open clips; just use something that is wooden or soft etc. so you won't make scratches anywhere. :cool:

Image

Case was pretty damn easy to open. There are only three screws and four clips to work with. Be sure to keep them in a safe place so you won't cry later on.

Image

After you've opened the whole thing, you'll just need to take this thing off from PCB and make your dreams come true. Yellow wire is inside of that bulky and black wire. If you want to make room for your controller, you'll have to cut a bit from that clip and cable holder off.

Image

Here I have my cable finished and I was making some adjustments. It's also very important that you won't cut wires too short. It seems to fit there just fine.

Image

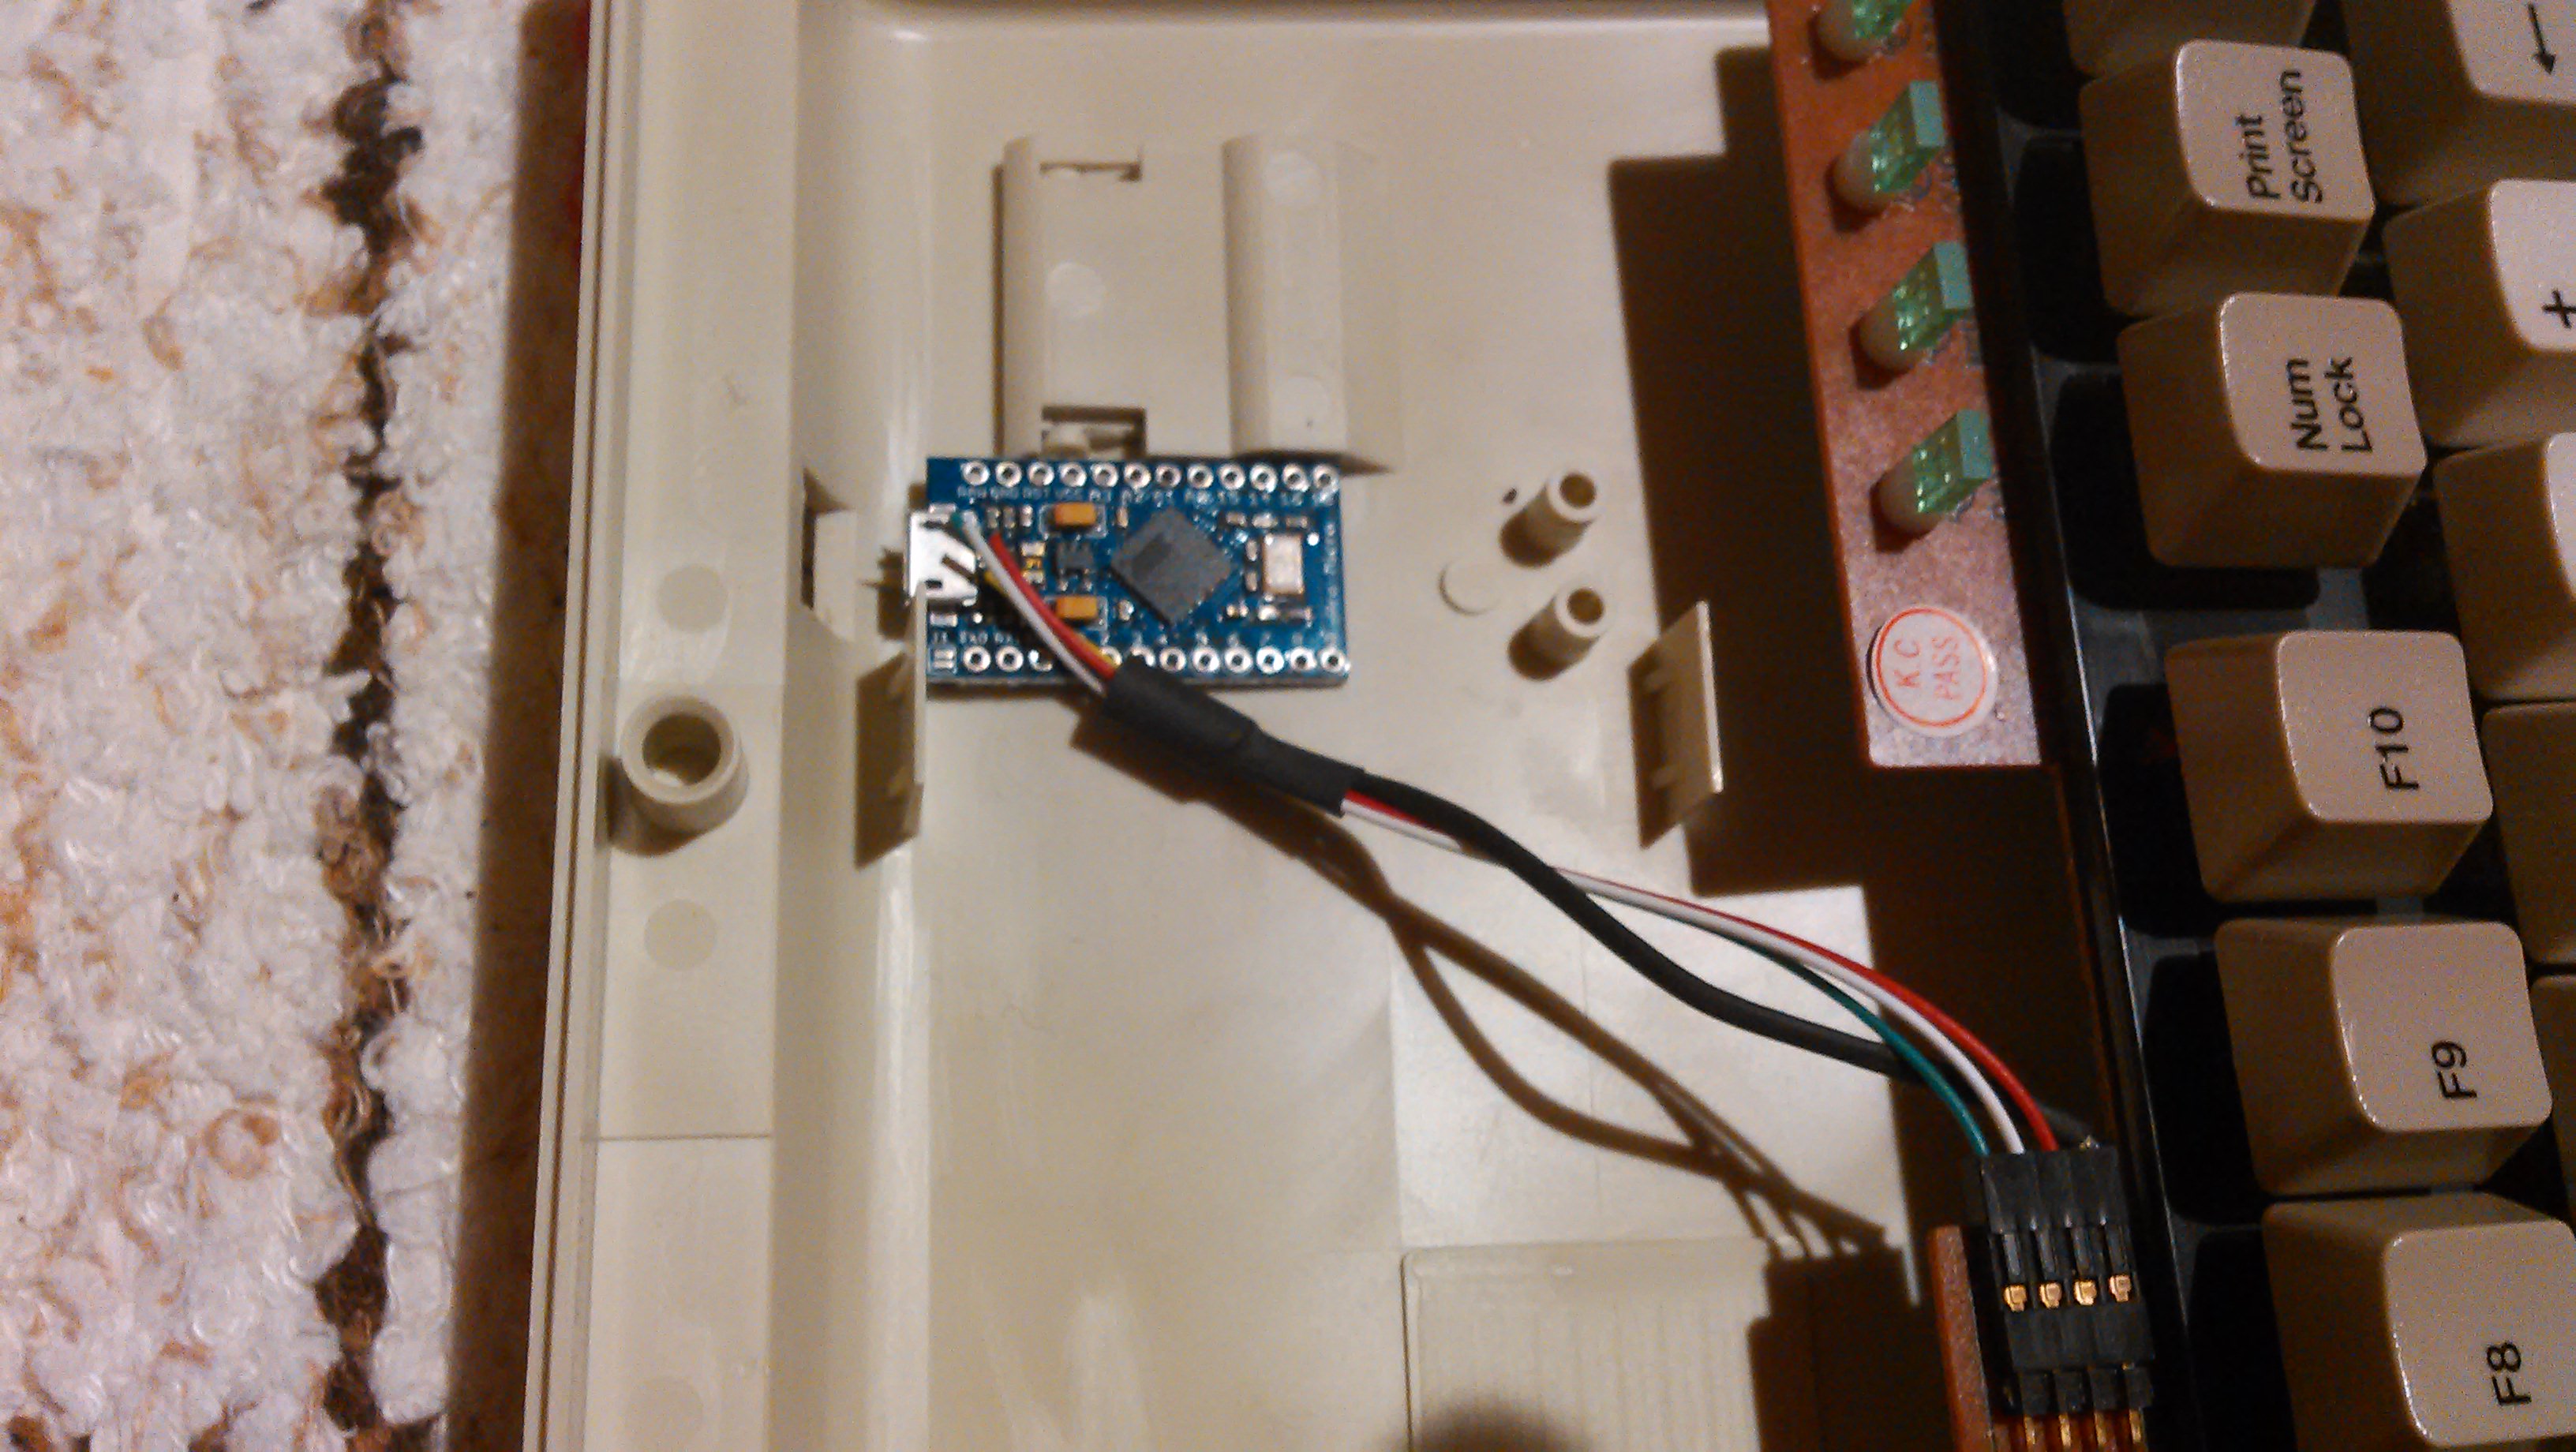
After I soldered things together I placed my Pro Micro on the bottom of the case and I spammed hot glue a lot around and pushed PCB with a tiny force to keep things tight.

Image

I felt quite happy when I looked how Pro Micro sat down.

Image

I'll update this guide if there's something that can be improved or if it's missing something. I'm feeling quite happy with this board and I can finally dive into the world of ALPS!
Last edited by Shinryuu on 30 Jan 2016, 10:15, edited 2 times in total.

User avatar
chzel

29 Jan 2016, 22:32

Fine write-up Shinryuu! Glad you got it working!

User avatar
scottc

29 Jan 2016, 22:32

Nice work, glad you got it working!

User avatar
Muirium
µ

30 Jan 2016, 05:38

Worked well. I'm too shy to glob in glue like that, but it clearly works a trick. Could spell trouble if you ever snag the USB cable — there's no strain relief — which would tear the micro USB port right off the Pro Micro, which would still be stuck inside the keyboard. So don't do that!

I like to use an internal USB extender cable, so I can hack the end of that into position at the port, and put the Teensy somewhere convenient, and protected. But it's more work and I'm just being fancy. (Yet forgot to bloody well post the pictures of the job I did on my AT here at DT, apparently. Booger!)

User avatar
Shinryuu

30 Jan 2016, 09:45

Yeah, this is a bit hackish and I'm a shady hot glue user. :cool: If if I ever run in to a trouble I'm willing to clean things and make this mounting even better. Thanks for the info!

andrewjoy

01 Feb 2016, 11:08

Yours has the same little marks on the front of the case as mine does . No big issue can just remove the burs with a razor blade and you can hardly see it but i wonder if thats why there was a load of them NIB , possibly they failed QC ?

Ether way its a loverly board , it needs a bit of weight to it , i wish i had not recycled that bin bag full of sticky lead strips for making faux leaded windows.

McPwned

07 May 2016, 21:14

I got one of these keyboards and am doing the same mod. Thanks for the thread, it made the process really easy! The Pro Micro is all wired up and flashed with Soarer's converter, but one column is having serious trouble - F1, 2, W, S, X, caps. F1 usually works but not always, 2/W/S work only if I hold the key all the way down and wiggle, while X/caps can sometimes work with the preceding method but usually don't register at all.

I took my multimeter to the PCB, but everything checks out - each switch seems to allow current just fine when pressed, and the path from F1 to caps lock appears to be fine. I checked the circuit from the other pin on caps lock to where the column connects to the controller, and if I press caps lock the circuit is completed.

In short, I don't know what's wrong and would like suggestions on what troubleshooting steps I could take. Any advice would be appreciated. Here's a picture of the PCB for reference:

Image

Thanks in advance. If I should take this question elsewhere, please let me know.

Post Reply

Return to “Workshop”